a slow march towards vim, part 2
This is part of a series, see learning vim for the introduction.
A bit of a prelude before we get into things. Learning to be productive
with vim isn't intuitive, especially if you are not used to text interfaces
or minimal ui applications. I would get stuck frustrated, and either
jump to the shell, or open another editor to get things done and move on.
This is normal, stick with it!
vim has a few things behind the scenes, which are worth understanding well to really get into a state of flow1 when working with vim.
buffers & windows
vim has two concepts that need a bit of a deep dive as they come into play when working with multiple files.
buffers and windows are not unique to vim, but they play a large part in how things work behind the scenes.
a buffer, what's that?
So when you open a file open vim, what you see on the
screen are the contents of a buffer. It can either contain
portions of a file (if you opened vim with a file argument),
a blank buffer, or the default vim startup page depending
on how vim is setup.
A buffer is a spot in memory that holds text, which could be the contents of a file that exists, or one that you are about to write (in the case of a blank buffer).2
Things to know about buffers:
- buffers are independent and not linked to each other.
- not all buffers are always visible
- as they exist in memory, buffers are temporary.
Opening a file for editing :e somefile.txt (or with vim somefile.txt), will open it
in its own buffer.
Buffer operations:
- To switch buffers,
:bn(next buffer),:bp(previous buffer) :lsor:buffersto list all buffers.:b <number>or:buffer <number>go to a specific buffer:bdor:bdeleteto delete a buffer:wwrite the contents of the buffer to a file
window
A window is well .. your window onto a buffer. Quite literally, its the viewport that allows you to see what is on a buffer.
On launch, you are looking at a window, which is showing you the contents of a specific buffer.
Creating new windows is done by splitting the default window,
with :split for horizontal splitting and :vsplit for vertical
splitting.
Windows are completely independent to buffers. Windows can be attached to different buffers - so one view, you can have multiple windows over multiple buffers, and multiple windows over the same buffer, but at different locations on that buffer.
working with windows & buffers
To understand how buffers & windows interact, lets start with an example. Open vim,
type :split and :vsplit. In a plain installation of vim, your screen should
look like this:

vim after running :split and :vsplit
You can see [No Name], this signifies that the buffer has no name, or its not
written to a file. Now, lets try to add some content by typing iHello, and you'll see a few things:
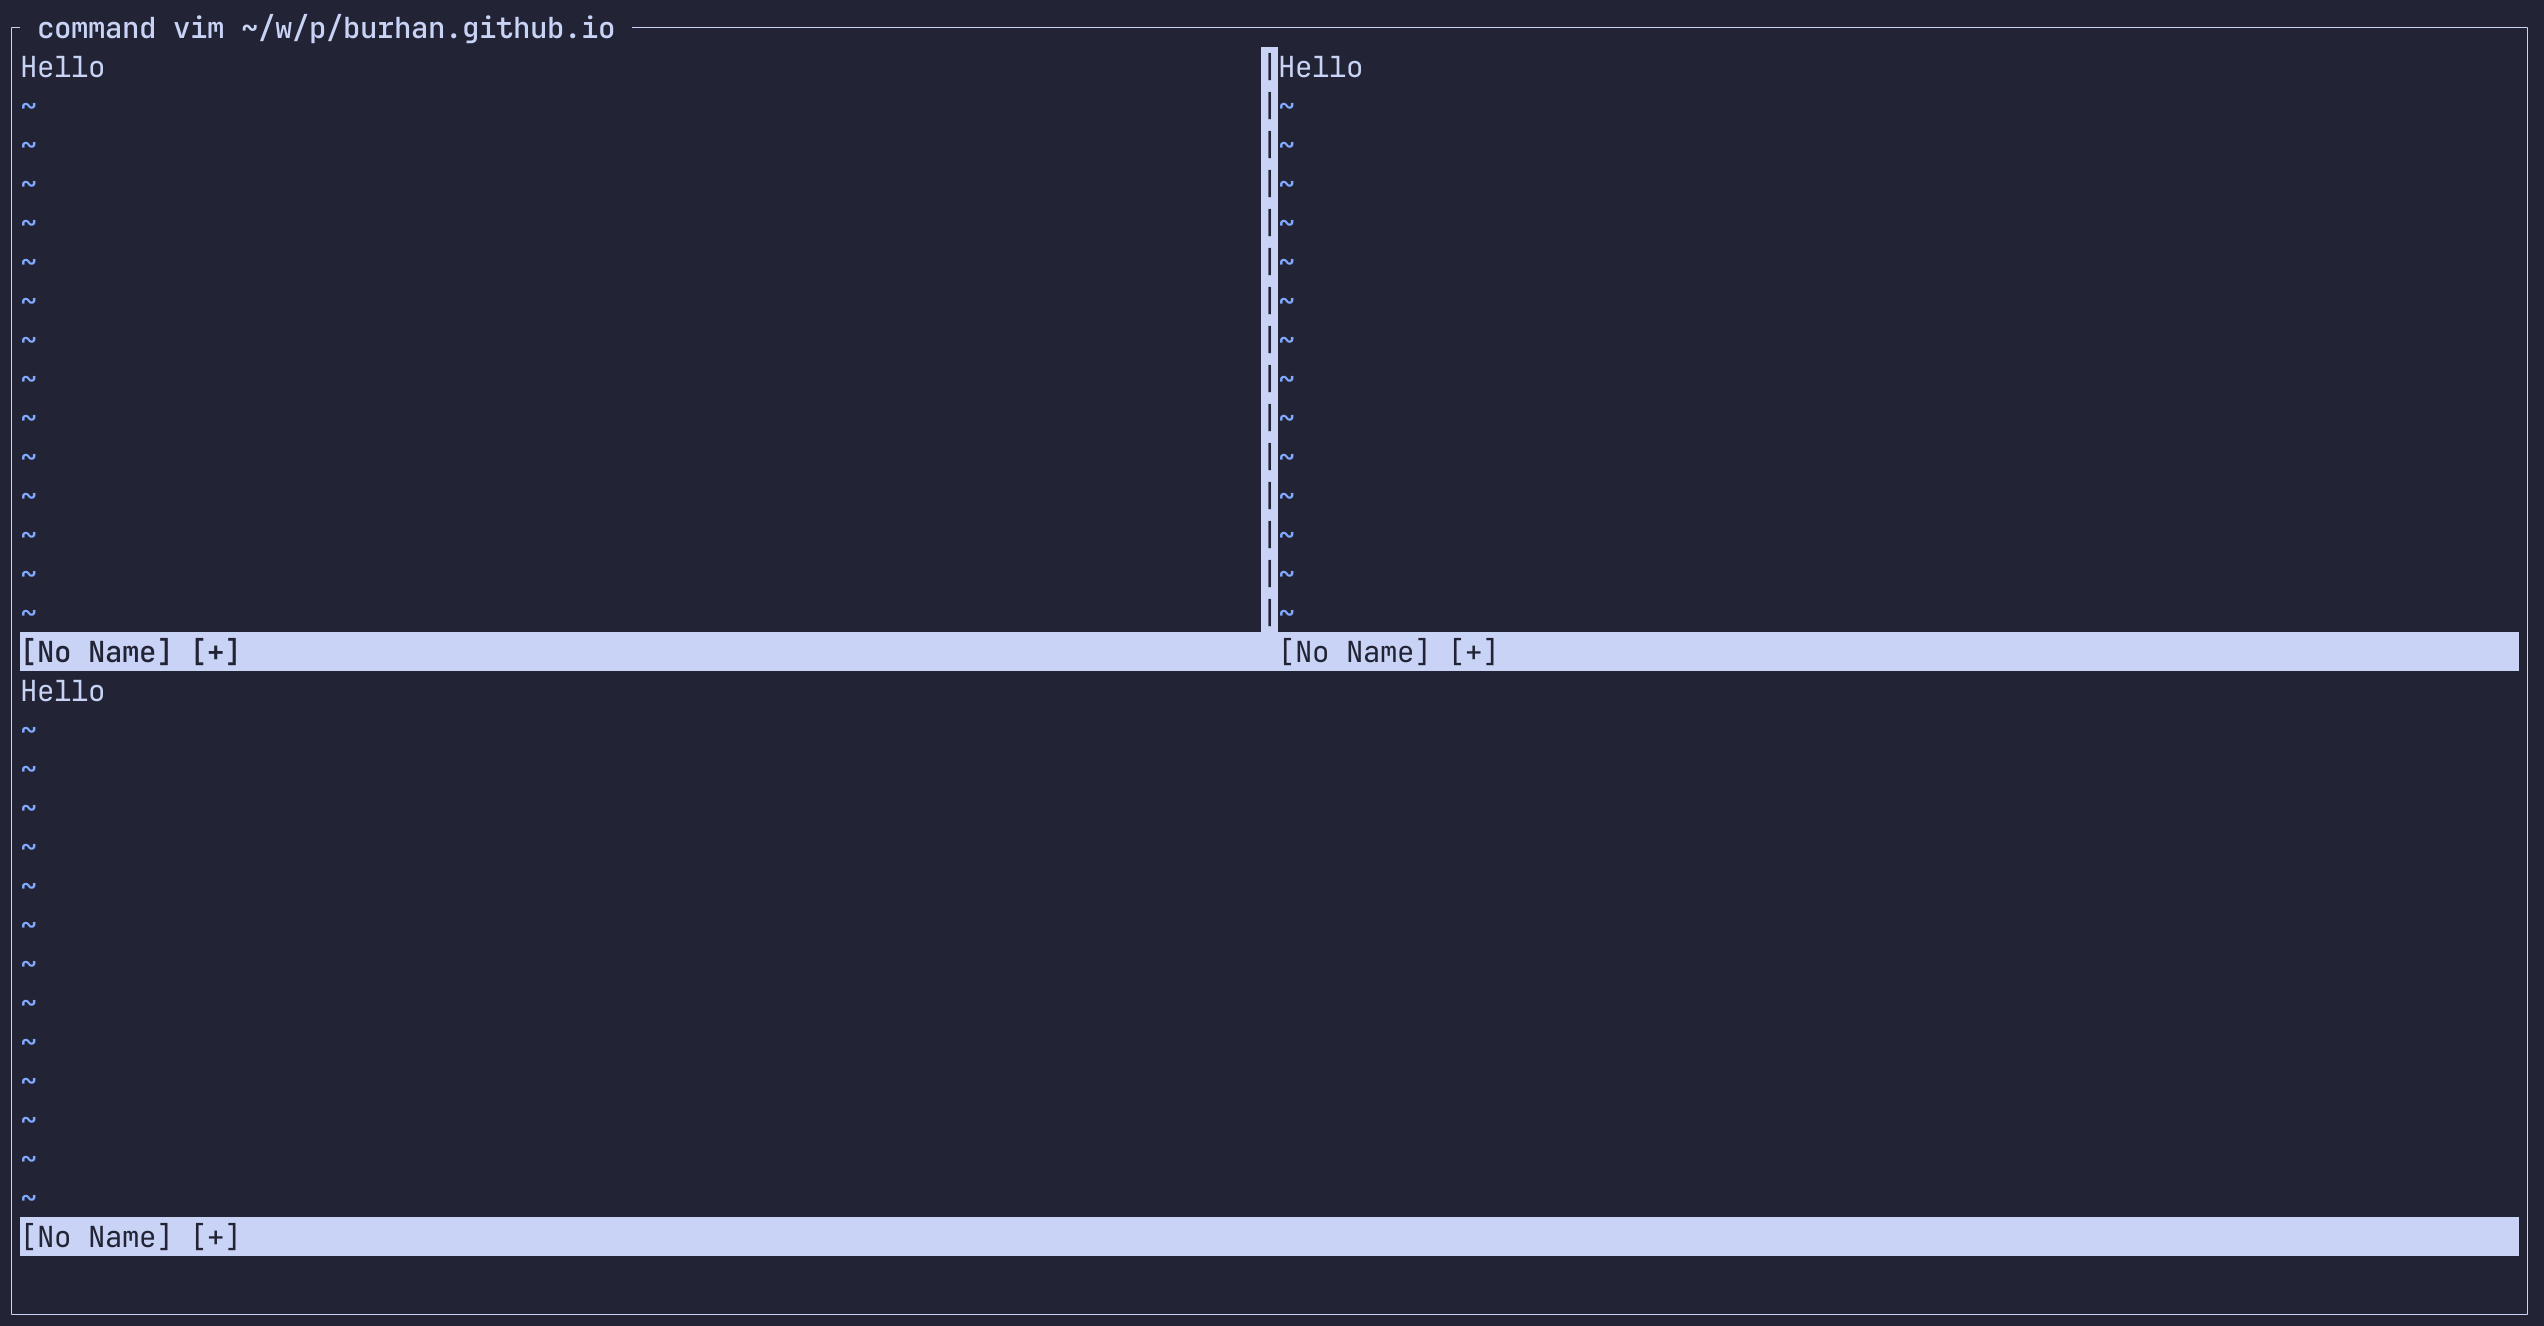
many windows, one buffer
Hellois shown on each window- You see
[+], which indicates the buffer has content, that isn't committed.
What's going on? We have a default buffer, but multiple views over this buffer, and all windows are starting at the same spot (the top of the buffer).
The last important thing here is how to name buffers, and there are some nuances:
-
If the buffer is unsaved, use
:file newnameto give it a name. This also helps if you want to have it displayed as something else, without changing the name of the actual file its displaying. -
Use
:saveas newnamewhich will as it suggests, save it as a different name than the file that is displaying. -
Of course, I would be remiss if I didn't mention
:wto write the contents of the buffer to the file.
the first steps with windows
So next onto windows.
We can move a window to a different place in the underlying buffer, and if you ever did a gg or G or :<number>,
you were moving the window to the top, bottom and to line <number>. There are a few ways to
get more specific with movement:
- Cursor Anchored:
zt, scroll so the cursor is at the top.zz, scroll so the cursor is in the middle.zb, scroll so the cursor is at the bottom.zs, scroll so the line with the cursor becomes the first visible line.ze, scroll so the line with the cursor becomes the last visible line.
- Cursor Independent:
H, scroll the window to the topM, scroll the window to the middleL, scroll the window to the bottom
To move between visible windows, CTRL+w followed by h,j,k,l to move left, down, up or right.
Next, you can resize the window to view more of the buffer. There are two ways to do this, depending on how precise you want the resizing. I prefer the the keyboard shortcuts as they align well with how I think.
- Keyboard Shortcuts:
CTRL+w >&CTRL+w <increase (>) or decrease (<) width[count]CTRL+w |set a specific width in columns. To set it for 40 columns,40Ctrl+w|CTRL+w +&CTRL+w -increase (+) or decrease (-) height[count]CTRL+w _set the height to a specific size. To set it for 40 rows,40Ctrl+w_CTRL+w =, make all windows equal.
- Ex Commands:
:resize {number}, resize the hight by{number}of rows:vertical resize {number}, resize the width by{number}of columns
A few tips that helped me out:
- The
>&<, and+and-variations adjust settings relative to the current window size, and you can use a[count]with them as well. For example a40CTRL+w>would mean increase the width by 40 columns. :set lines?and:set columns?will tell you the current value for lines and columns:winheightand:winwidthwill display the current settings for the window.
changing the underlying buffer of a window
So once you figure out the magic of windows, the next thing is doing multiple file edits and other fun things.
The first thing I learned was how to change the underlying buffer of the window, and by far
the easiest way (other than the plugins), is to first, focus on the window you want to switch
and type :buffer (note the space). The space will trigger an autocomplete as you start typing
the name of your buffer. Or, you can type the number of the buffer directly.
The other way, which I recently discovered is to use the following commands:
CTRL+w f. This opens the file under the cursor in the current window. To use this, type a file name, place the cursor on it, and thenctrl+wf.CTRL+w p. Swap with whatever was previously the active buffer in the window.CTRL+w n. Open a new buffer in the current window.
putting it all together
You can open multiple files in vim from the command line, just give the file names as
arguments: vim one.txt two.txt three.txt
If you try this out, you may be confused because you'll just see just one file open,
the first one. The others? They are open in buffers that are not visible to you. Type :ls
and you'll see this:
:ls
  1 %a   "one.txt"                      line 1
  2      "two.txt"                      line 0
  3      "three.txt"                    line 0
The output format is:
- The buffer number
- Next, a series of flags for that buffer, there are a few:
%, the one currently active (ie, the one where you are)#, the previous one, if you want to doCTRL+wp, it will switch to this one.a, means the buffer is loaded, and visible (even if you don't have a window on it right now).h, buffer is hidden.=means the buffer is read-only+means the buffer has changes not saved-means the buffer is unmodifed since it was last saved
- Next, the name of the file or
[No Name]if its a new or unsaved buffer. - Next, the line where the cursor was last positioned on that buffer.
Knowing what we know now, we can view all three files, by these series of commands:
:split 2or:sb 2- create a new window horizontally with the contents of buffer number 2 on top:vsplit 3or:vert sb 3- create a new window vertically with the contents of buffer number 3 on the left.
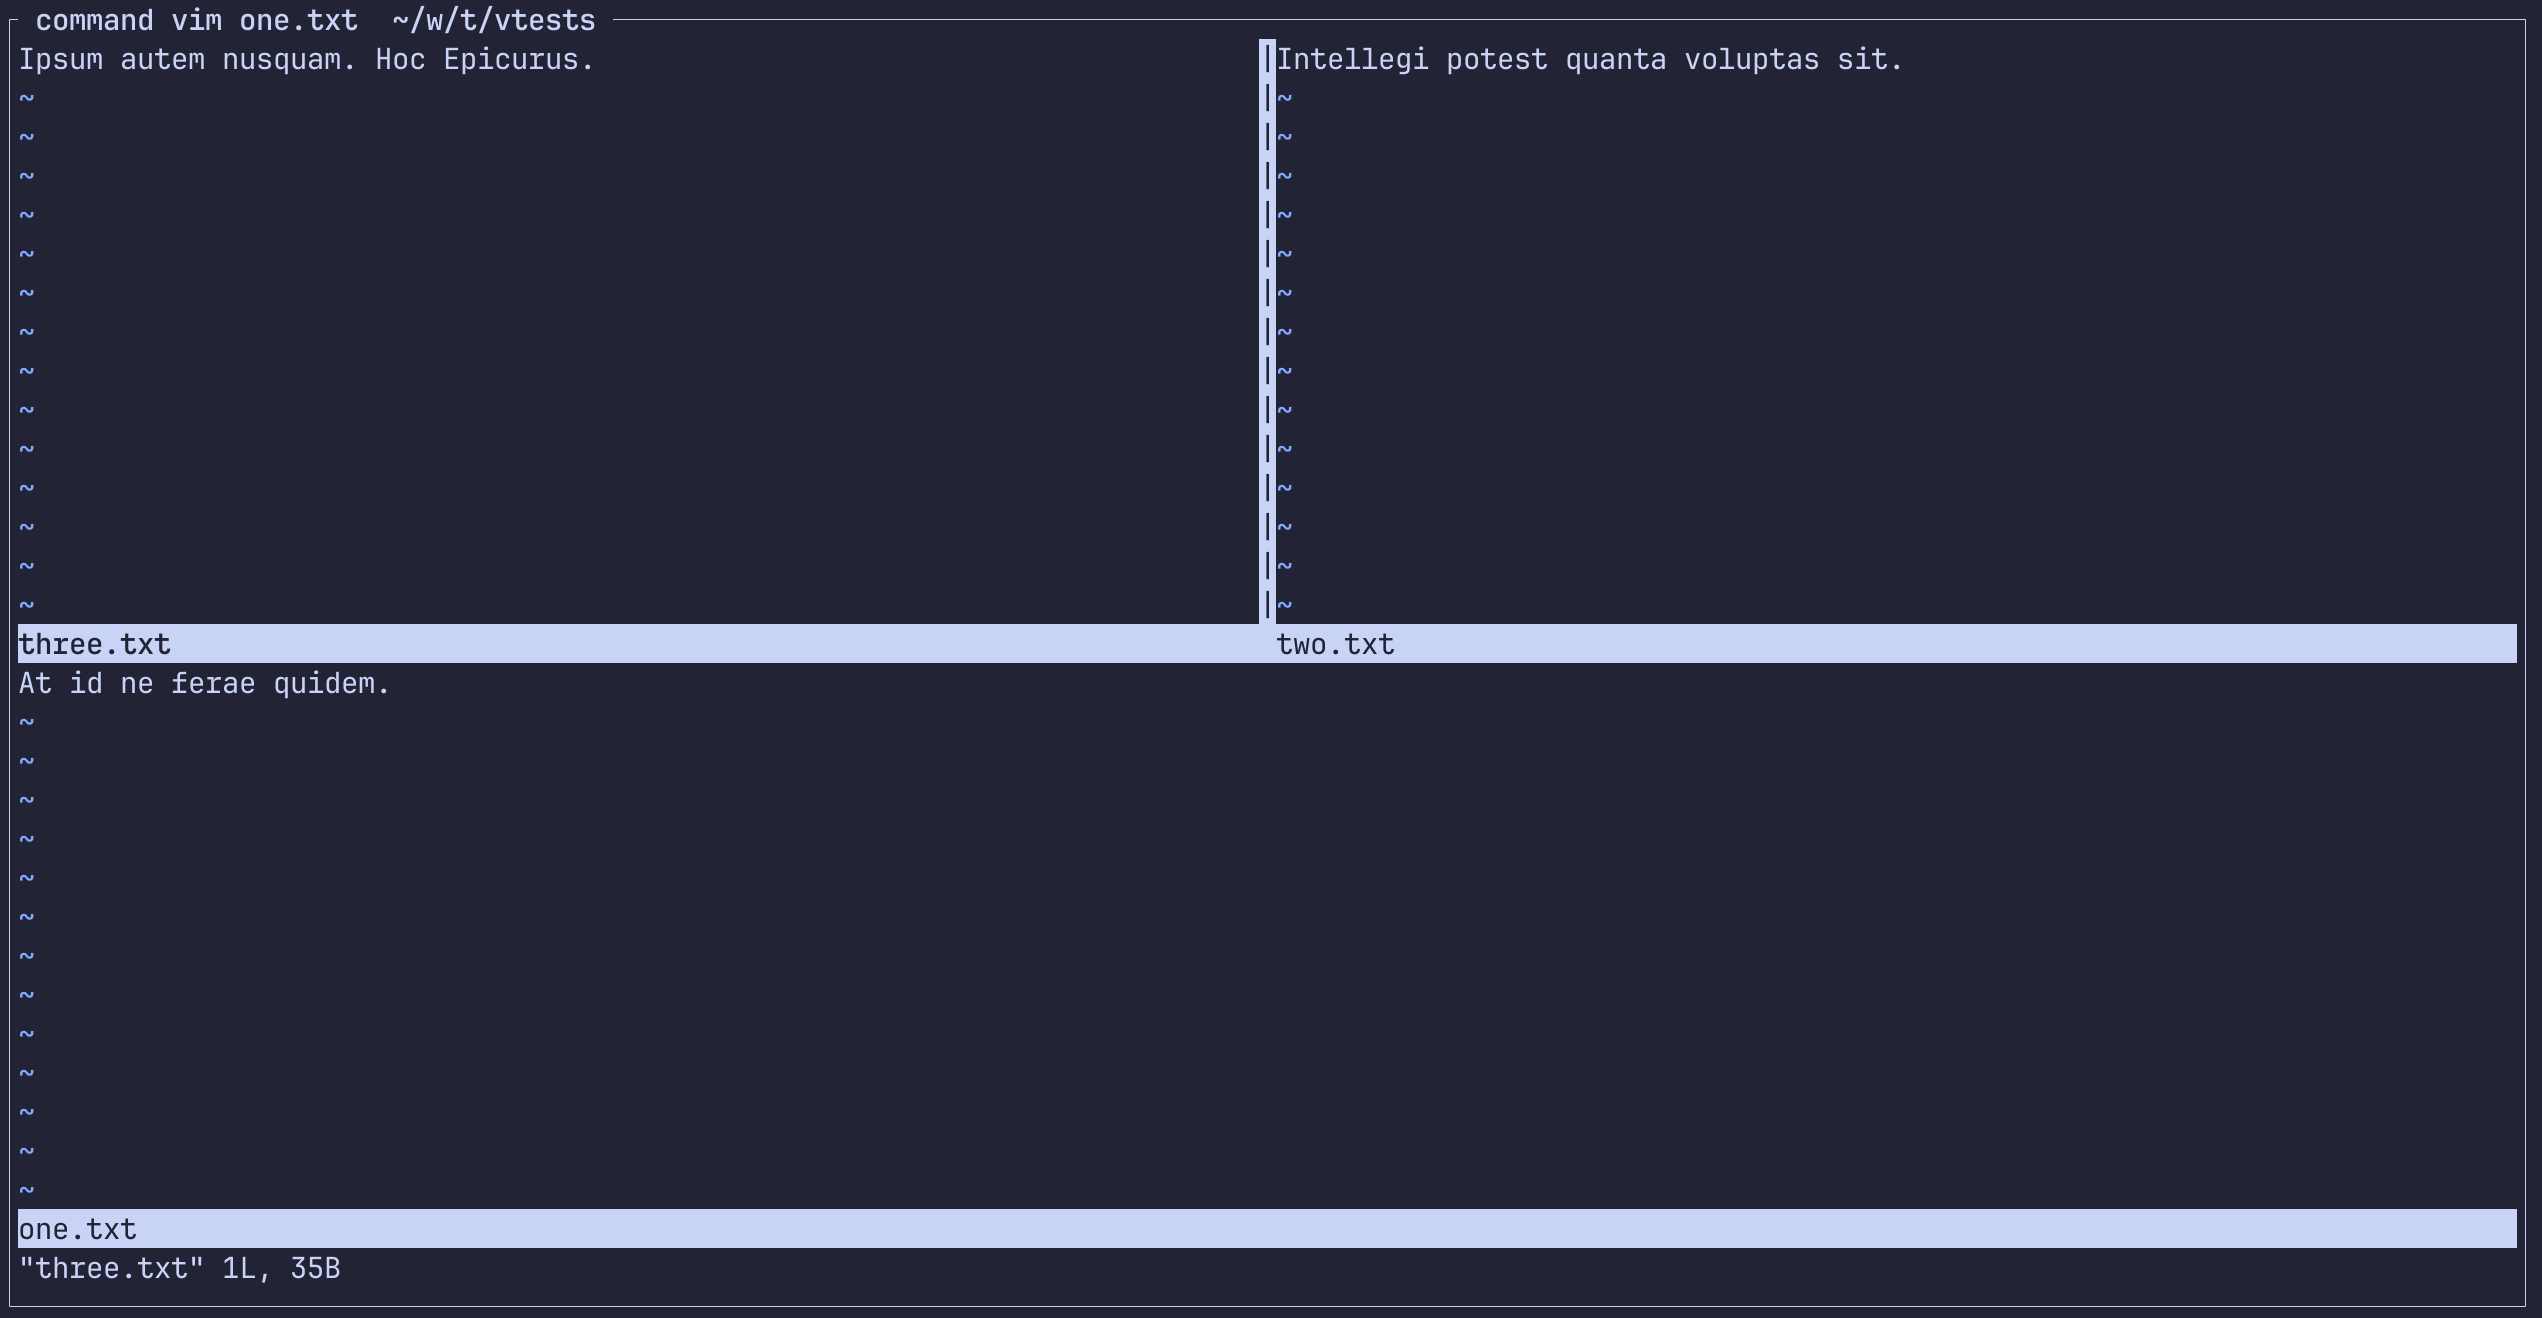
split view showing files
However, there is an even shorter way to do this with -o (small letter o) and -O (capital letter O)
command line flags:
vim -o one.txt two.txt three.txt(open three files split horizontally)vim -O one.txt two.txt three.txt(open three files split vertically)
tabs
I've left tabs at the last because frankly, I'm a bit confused as to when to use tabs vs. windows and buffers and its not at all like what I am used to when it comes to tabs in the browser.
So formally, a tab in vim is a collection of windows, but if you think about it for a bit, a collection of windows is just a layout. So tabs are a way to pre-define a set of layouts.
I'm still learning how to incorporate tabs into my work, because I still don't use vim for major projects where I have multiple layouts which I believe is a good use case for tabs.
So more on this as I start to learn how to use tabs, but so far I've explored three commands:
:tabnewto create a new tab. It can also take a filename to open in the new tab.gt, go to the next tab, andgTgo to the previous tab.:tabsto view tabs
a few more tricks & tips
- to quit all buffers,
:qa, which will warn you of unsaved changes. To ignore the warnings,:qa! - to run a command (such as a find-and-replace), over multiple buffers, use
:bufdo <the command>
1 to me, flow is when I can minimize context switching.
2 the formal definition is A buffer is the in-memory text of a file.